Bake Play Smile

MENUMENU
  • Recipes
  • Thermomix
  • Desserts
  • Shop
  • Subscribe
menu icon
go to homepage
  • Recipes
  • Thermomix
  • Desserts
  • Shop
  • Subscribe
    • Facebook
    • Instagram
    • Pinterest
    • YouTube
  • subscribe
    search icon
    Homepage link
    • Recipes
    • Thermomix
    • Desserts
    • Shop
    • Subscribe
    • Facebook
    • Instagram
    • Pinterest
    • YouTube
  • ×
    Home » Recipes » Savoury Breads & Muffins

    Cheese And Vegemite Scrolls

    Published: Mar 27, 2025 by Lucy · This post may contain affiliate links · 81 Comments

    Jump to Recipe
    Cheese and Vegemite Scrolls

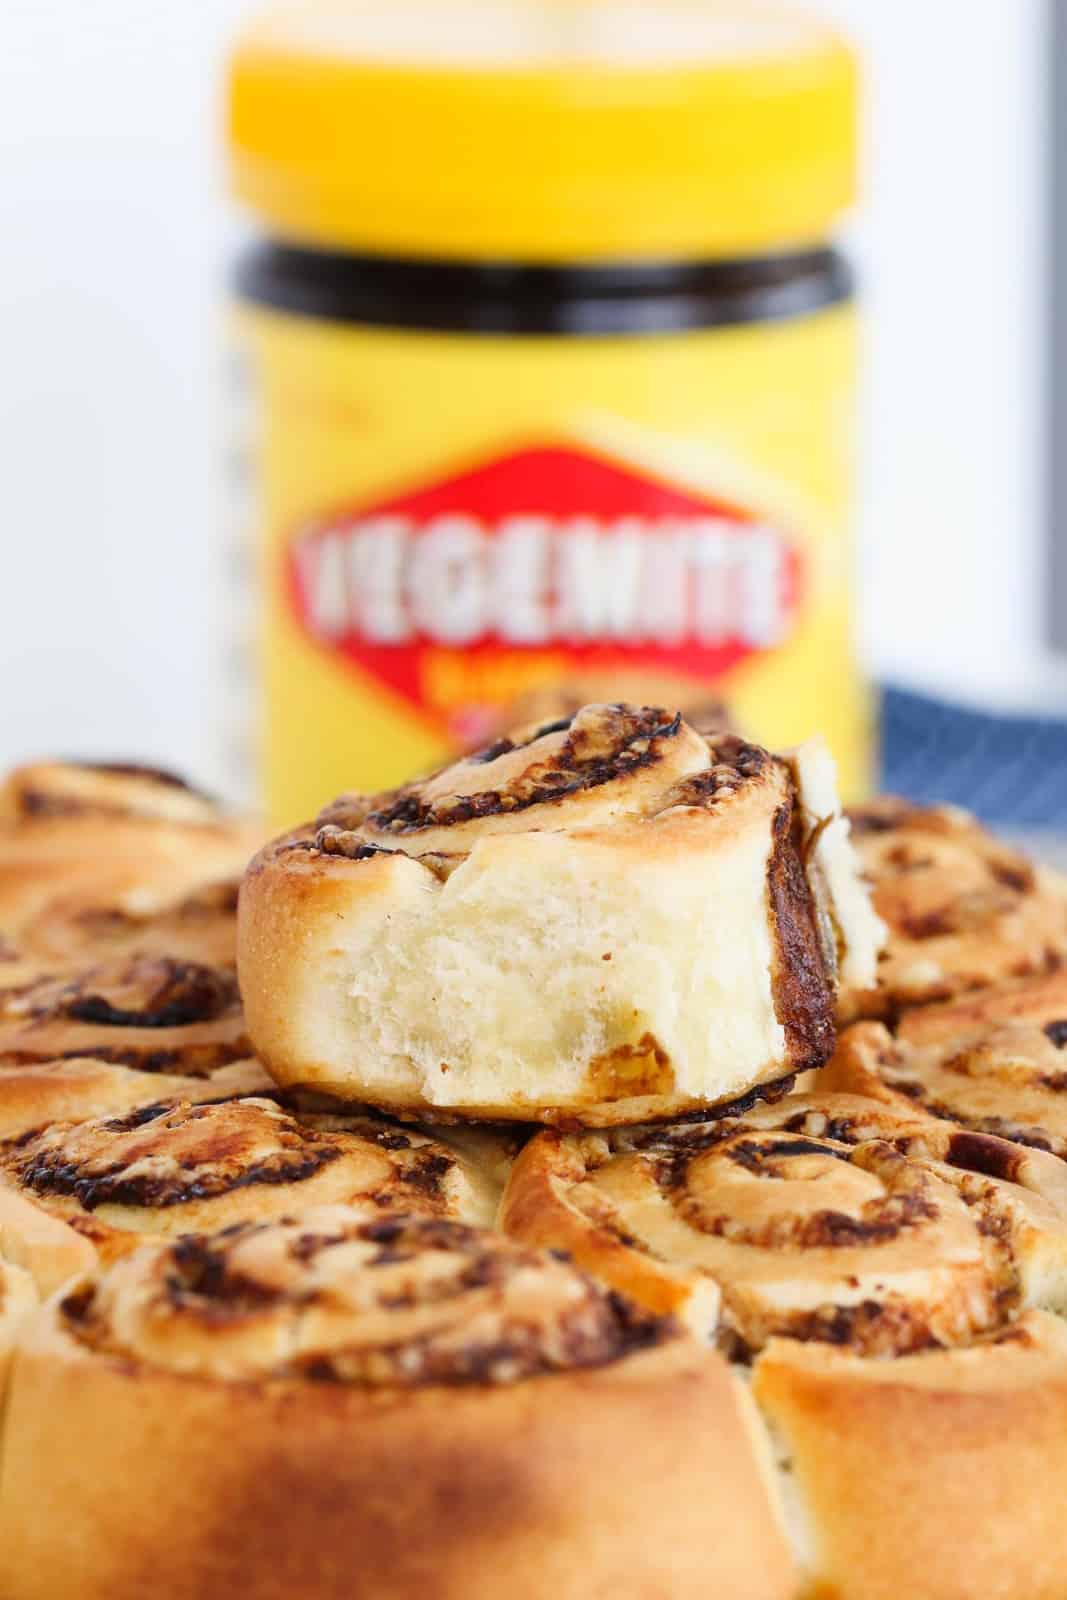
    Is there anything more Aussie than cheese and Vegemite scrolls? Soft, fluffy dough, a swirl of salty Vegemite and plenty of melted cheese... and best of all, there's no yeast and no rising time needed - ready to eat in just 35 minutes!

    These scrolls are quick, easy, and lunchbox-perfect. Just like my Ham and Cheese Pinwheels or Cheese and Bacon Rolls, they always disappear fast!

    A baked scroll with a vegemite and cheese filling sitting on top of a layer of scrolls in front of a Vegemite jar.

    I’m glad I found this easy recipe! Bakery-bought scrolls are expensive, and these hit the spot for school snacks. Thank you!

    - Looloo

    Whether you grew up with these on your tuckshop order or you’re packing them into your kids’ lunchboxes now, cheese and Vegemite scrolls are a true comfort classic. The soft dough is quick and easy to make (no yeast or rising time needed!), and the savoury Vegemite and cheese combo is just magic.

    This recipe is based on a simple 3-ingredient dough (self-raising flour, butter and milk), which is also used in my Quick Pizza Scrolls. You’ll have a batch whipped up and in the oven in no time. Plus, they’re great for freezing – so you can stock the freezer and pull them out whenever you need a snack or lunchbox filler!

    Why You're Going To Love This Recipe

    • ✨ No yeast, no worries – Ready in 35 minutes with no rising time.
    • 😋 That classic salty-cheesy combo – It’s just so nostalgic (and delicious!).
    • 🧵 Perfect for lunchboxes – Kid-approved and freezer-friendly.
    • 🚪 Budget-friendly – Made from pantry and fridge staples.
    • 🚗 Great for make-ahead – Bake and freeze in batches.
    Jump to:
    • Why You're Going To Love This Recipe
    • Scroll Ingredients
    • Variations
    • How To Make Cheese and Vegemite Scrolls
    • Top Tip
    • Recipe Tips
    • Cheese and Vegemite Scrolls FAQs
    • More Popular Lunchbox Recipes
    • Cheese and Vegemite Scrolls

    Scroll Ingredients

    You only need a few pantry staples to whip up these esay Vegemite and Cheese Scrolls!

    Note: Scroll to the recipe card at the bottom for the ingredients, quantities and full detailed method

    The ingredients for cheese and vegemite scrolls in small bowls.
    • Butter (chilled) – Rubbing chilled butter into the flour creates a soft, fluffy dough with a scone-like texture.
    • Vegemite – Start with less if your kids are new to it! You can always add more next time.
    • Cheddar cheese – Freshly grated works best for that melt-and-pull factor. You can use tasty, Colby or a mix with mozzarella.

    Variations

    • Gluten-Free – Swap the self-raising flour for a quality gluten-free SR flour blend.
    • Extra cheesy – Sprinkle a little grated cheese over the top of the scrolls before baking.
    • Mini scrolls – Cut smaller pieces for bite-sized lunchbox or party snacks.
    • Puff pastry shortcut – Swap the dough for a sheet of puff pastry for a buttery, flaky version. Just roll, fill, slice and bake!
    • Bacon lovers – Add some finely diced cooked bacon with the cheese for an even more delicious scroll.

    How To Make Cheese and Vegemite Scrolls

    Once you see how quick and easy homemade fluffy scrolls are, and how much better they taste, store-bought scrolls will not get a look in anymore!

    Note: Scroll to the recipe card at the bottom for the ingredients, quantities and full detailed method. 

    Self-raising flour and butter in a glass bowl on a marble countertop.
    1. Step 1: Place the sifted self-raising flour and roughly chopped butter into a mixing bowl.
    Self-raising flour and butter rubbed to resemble breadcrumbs, in a glass bowl.
    1. Step 2: Rub the butter into the flour until it resembles breadcrumbs.
    Bread dough in a glass bowl on a marble bench top.
    1. Step 3: Add the milk and mix the ingredients together until a dough is formed and knead until smooth.
    Dough rolled out on a wooden board, spread with Vegemite and sprinkled with grated cheese.
    1. Step 4: Roll the dough out into a rectangle shape on a lightly floured surface. Spread the butter, Vegemite and grated cheese over the top.
    Rolled up log of dough sliced into 2-3cm pieces.
    1. Step 5: Roll the soft dough up starting from the long side. Use a sharp knife to cut the dough into 3-4 cm pieces.
    Dough scrolls with a cheese and Vegemite filling in a round baking tin.
    1. Step 6: Arrange the scrolls into the prepared baking tray or tin.

      Bake in a preheated oven for about 15-20 minutes or until golden brown.

    Top Tip

    Sprinkle a little extra grated cheese over the top of each scroll before baking.

    Recipe Tips

    ☕ Softened butter and Vegemite spreads easier – Warm slightly or mix with a touch of hot water.

    🐿 Don’t skip lining your tin – Even non-stick tins can stick due to melting cheese.

    🚪 Close placement = soft sides – Placing scrolls snugly together keeps them soft and fluffy.

    ❄️ Freezer-friendly – Let scrolls cool, then freeze in airtight containers or resealable bags for up to 3 months.

    🥜 Fridge storage – Keep in an airtight container for up to 2 days and reheat to serve.

    📦 Reheat to freshen – Microwave briefly or pop in the oven to get that freshly-baked feel.

    🧁 Add a mix of cheeses – Tasty, mozzarella, parmesan – it’s all good!

    A speckled white plate with cheese and vegemite bread scrolls and a blurred Vegemite jar in the background.

    Cheese and Vegemite Scrolls FAQs

    Can I make Cheese and Vegemite Scrolls with puff pastry instead of dough?

    You sure can! It’ll give a more buttery, flaky scroll. Follow the same process but reduce the baking time slightly.

    Can I make the dough ahead of time?

    You can prep the dough and store it in the fridge (wrapped tightly) for up to 24 hours before rolling and baking.

    Why is a round or springform tin better for Cheese and Vegemite Scrolls than a flat tray?

    It helps the scrolls bake together, keeping the edges softer than if baked separately on a flat tray.

    How do I stop the scrolls from unrolling while baking?

    Roll tightly and place the scrolls with the seam-side touching another scroll or the tin edge.

    How long can the Cheese and Vegemite Scrolls be stored?

    Store in an airtight container in the fridge for up to 2 days or freeze for up to 3 months.

    More Popular Lunchbox Recipes

    For more quick and easy lunchbox snacks, try some of my other recipes:

    • No-Bake Rum Balls made with coconut, biscuits, condensed milk and cocoa powder.
      Kid-Friendly Rum Balls
    • Golden biscuits piled on a white cake tray
      Hokey Pokey Biscuits
    • Crispy pork sausage rolls cooling on a wire rack.
      Homemade Sausage Rolls
    • A plate of creamy egg sandwiches with mayonnaise.
      Egg And Mayo Sandwiches

    WANT EVEN MORE DELICIOUS RECIPES? Subscribe to my newsletter or follow along on Facebook or Instagram. And if you love baking, then please come and join my Facebook cooking club group or subscribe to my YouTube channel.

    A pile of cheese and vegemite scrolls.

    Cheese and Vegemite Scrolls

    Cheese and Vegemite Scrolls combine the much-loved, classic Australian flavour combination with a soft, fluffy bread dough. You simply can't find an easier and more delicious Aussie lunchbox favourite than these!
    5 from 104 votes
    Print Pin Rate
    Course: Snacks
    Cuisine: scrolls
    Prep Time: 15 minutes minutes
    Cook Time: 20 minutes minutes
    Total Time: 35 minutes minutes
    Servings: 16 scrolls
    Calories: 123kcal
    Author: Lucy - Bake Play Smile

    Ingredients

    • 300 g (2 cups) self raising flour
    • 90 g butter chilled, roughly chopped
    • 150 ml (150g) milk
    • 2 tbs butter (or margarine), for spreading
    • 5 tbs Vegemite
    • 80 g cheddar cheese
    Prevent your screen from going dark

    Instructions

    Conventional Method

    • Preheat oven to 200 degrees Celsius (fan-forced). (See notes)
    • Grease and line a 23cm round, springform baking tin with baking paper, and set aside until needed.
    • Sift the self-raising flour into a bowl.
    • Add the butter and rub into the flour until the mixture resembles breadcrumbs.
    • Add the milk and mix gently until the mixture forms a dough.
    • Knead the dough, on a lightly floured cutting board, until smooth.
    • Roll the dough into a long rectangular shape, about 1 cm thick.
    • Spread the butter and then the Vegemite over the dough, leaving a 1cm border.
    • Grate the cheese before sprinkling it over the Vegemite. 
    • Starting from the long edge of the rectangle, roll the dough firmly into a log.
    • Using a sharp knife, cut the roll into 3-4 cm slices.
    • Place the slices, cut side up, into the prepared tin.
    • Bake for 15-20 minutes or until golden. The scrolls will sound hollow when tapped once baked.
    • Leave the scrolls to cool in the tin for 10 minutes. Transfer to a wire rack to cool completely.

    Thermomix Method

    • Preheat oven to 200 degrees Celsius (fan forced). (See notes)
    • Grease and line a 23cm round, springform baking tin with baking paper, and set aside until needed.
    • Weigh the self-raising flour and butter into the Thermomix bowl. Mix for 6 seconds, Speed 6.
    • Add the milk and knead for 2 minutes, Kneading Function.
    • Transfer the dough to a lightly floured cutting board and roll into a long rectangular shape, about 1 cm thick.
    • Spread the butter and then the Vegemite over the dough, leaving a 1cm border.
    • Weigh the cheese, roughly chopped into cubes, into the Thermomix and grate for 8 seconds, Speed 8.
    • Sprinkle the grated cheese over the Vegemite.
    • Starting from the long edge of the rectangle, roll the dough firmly into a log.
    • Using a sharp knife, cut the roll into 3-4 cm slices.
    • Place the slices, cut side up, into the prepared tin.
    • Bake for 15-20 minutes or until golden. The scrolls will sound hollow when tapped once baked.
    • Leave the scrolls to cool in the tin for 10 minutes. Transfer to a wire rack to cool completely.

    Notes

    RECIPE NOTES & TIPS
    If using a conventional oven, preheat to 220 degrees Celsius. 
    I like to bake the scrolls in a round cake tin that has been greased and lined with baking paper, preferably a springform tin.
    You can use a flat baking tray that has been greased and lined with baking paper instead of a baking tin.  Place the scrolls on the tray with a little room to spread, but don't leave too big a gap between them.
    I highly recommend using baking paper, even in a non-stick baking tin, as the cheese melts during baking and can make the scrolls stick to the base of the tin.
    You can experiment with different types of cheese. A blend of grated cheddar and mozzarella cheese is lovely!
    The scrolls can be stored in a refrigerated, airtight container for up to 2 days. 
    Alternatively, they can be frozen, in an airtight container, or resealable bags, for up to 3 months.

    Nutrition

    Calories: 123kcal | Carbohydrates: 15g | Protein: 5g | Fat: 4g | Saturated Fat: 3g | Cholesterol: 12mg | Sodium: 198mg | Potassium: 135mg | Fiber: 1g | Sugar: 1g | Vitamin A: 130IU | Calcium: 67mg | Iron: 0.4mg
    Did you try this recipe?Mention @BakePlaySmileBlog or tag #BakePlaySmile!

    More Easy Savoury Muffin and Bread Recipes

    • 3 Ingredient Quiche Crust
      3 Ingredient Quiche Crust
    • A stack of Halloumi & Zucchini Fritters with sour cream and spring onions on top.
      Halloumi and Zucchini Fritters
    • Crunchy baked cheese twists in a jar in front of a packet of cheddar cheese.
      Puff Pastry Cheese Twists
    • A stack of creamy chicken coronation sandwiches with lettuce.
      Coronation Chicken Sandwiches

    Comments

    1. Sofie Uren says

      January 27, 2025 at 4:45 pm

      5 stars
      Easy simple recipe at the tip of the fingers and straightforward and easy to understand.

      Reply
    2. Kaex says

      September 11, 2024 at 1:01 pm

      5 stars
      Delicious, easy to make, fun. The first time I made bread was using this recipe, and I loved it so I made one again! It was sooooooo delicious!

      Reply
      • Lucy says

        September 12, 2024 at 8:11 am

        Yay! I'm so happy to hear that!

        Reply
    3. Mark Sanders says

      August 19, 2024 at 2:56 pm

      5 stars
      Easy to make especially for a beginner like me

      Reply
    4. Katrina says

      May 29, 2024 at 1:39 pm

      Hey Lucy. I’m looking for some make ahead recipes for my daughter birthday party. Do you think I could prepare and freeze this uncooked, and then pop straight into the oven from frozen on party day?

      Reply
      • Lucy says

        May 31, 2024 at 8:21 am

        Hi Katrina, I haven't personally tried that sorry!

        Reply
    « Older Comments
    5 from 104 votes (90 ratings without comment)

    Leave a Reply Cancel reply

    Your email address will not be published. Required fields are marked *

    Recipe Rating


    I’m Lucy! A mum, a wife, a food blogger and a lover of all things to do with food! I love creating delicious, no-fuss Thermomix and conventional recipes the whole family will love. Classic baking favourites, lunch box snacks, quick and easy family dinners and more!

    More about me →

    Trending Recipes You’ll Love

    • No-Bake Rum Balls made with coconut, biscuits, condensed milk and cocoa powder.
      Kid-Friendly Rum Balls
    • A quick and easy classic dark chocolate hedgehog slice made with crushed biscuits, walnuts, coconut and condensed milk... the perfect melt and mix slice!
      Chocolate Hedgehog Slice
    • Introducing the famous 100 Cookie Recipe made with just 4 ingredients... butter, caster sugar, condensed milk and self-raising flour. This freezer-friendly cookie dough can be flavoured with any add-ins you like!
      The Famous 100 Cookie Recipe | Easy Condensed Milk Cookies
    • This new and improved Lemon & Coconut Slice recipe is absolutely perfect! A beautiful tangy base topped with a creamy lemon frosting... it seriously doesn't get any better than this!
      Lemon Coconut Slice - New & Improved

    Cosy Winter Desserts

    • A forkful of moist sticky date pudding with caramel sauce and a scoop of vanilla ice cream.
      Sticky Date Pudding with Caramel Sauce
    • These super easy golden syrup dumplings are sure to become a family favourite! Serve hot with a big scoop of ice-cream for the perfect dessert.
      Easy Golden Syrup Dumplings | Winter Dessert Recipe
    • Chocolate self saucing pudding with ice cream on a plate.
      Chocolate Self-Saucing Pudding
    • A slice of apricot pie with a scoop of ice-cream on top.
      Apricot Pie
    Names of brands that Bake Play Smile has had recipes featured in.

    Lunch Box Snacks

    • A white cake stand with yo yo biscuits that have pink and blue filling.
      Yo Yo Biscuits | Classic Recipe
    • A bowl filled with malted milk and coconut balls.
      Milo Balls | 4 Ingredient Recipe
    • Pieces of chocolate coconut slice on a white plate.
      Easy Chocolate Coconut Slice | Most Popular
    • ANZAC oat biscuits cooling on a wire rack.
      ANZAC Biscuits

    Footer

    Subscribe for weekly updates!

    Subscribe
    • Contact
    • Privacy Policy
    • Terms & Conditions
    • Accessibility Policy
    • ↑ back to top

    Copyright © 2025 Bake Play Smile

    ↑ back to top

    Rate This Recipe

    Your vote:


    A rating is required
    A name is required
    An email is required

    Recipe Ratings without Comment

    Something went wrong. Please try again.